Over the years, I’ve learned that there is a fine line between ambition and discontentment. Aspiration is in my DNA, but I’ve discovered that the quest for more or next has often made me feel unsettled. I’ve also found that I have a design muscle that I ache to flex. Like many who have consciousness of #interiordesigninspo on the internet, you may feel a stirring of discontentment or unhappiness. Striving to emulate influential designers is often neither practical nor economical, especially for extensive renovations. Well, here is some unsolicited advice. Start Here. Start Now. And Start Small.
I have spent a year and a half tolerating my bedroom. It’s a small, somewhat narrow room in an old character house. Upon moving in Summer 2019, I put up an IKEA open closet system to keep costs low and keep my clothes acquisition and cleanliness checked. After that, I did nothing and just let my bedroom qualms absorb into my consciousness.
Here they are:
1. The room feels narrow and,
a) I couldn’t fit both my existing bedside tables and,
b) makes me feel claustrophobic sometimes
2. The window, while large, is off-centre and makes the room feel unbalanced
3. The current window treatment was a Venetian blind, which is always a bummer. I had to keep it closed most of the time since that’s the only spot in my room to get dressed
At my worst, I was living with a wild desire to buy a new house. As a Real Estate Agent Edmonton, it’s an easy trap to fall into and a very distracting one at that. There were a few signs from above that were hard to ignore. First, a property I was following and coveting was pending when I went to put in an offer. Second, a different house I was pending on had a series of serious issues I didn’t want to take on. So, I got the message: stay put! I decided to stop living in limbo and start some small room makeovers, up first: my bedroom!
Paint: adding major drama.
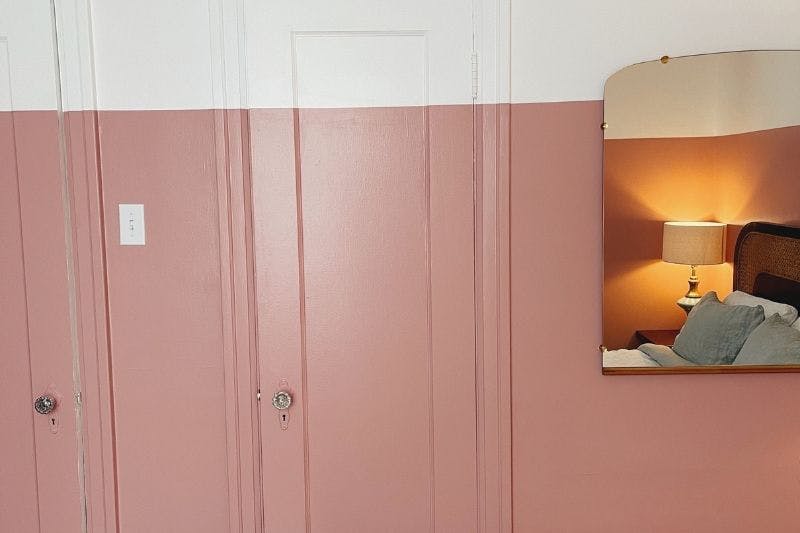
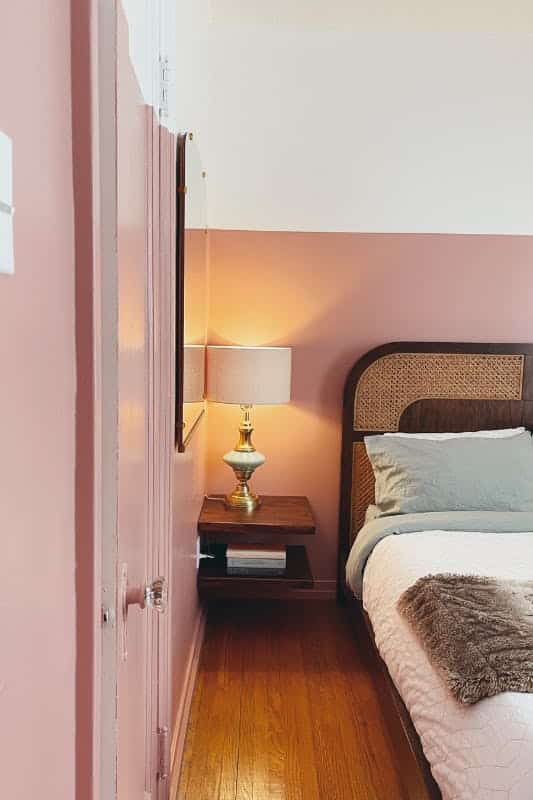
I’m drawn to rich colours, which can be problematic in a small space. To mitigate, I considered a feature wall behind my bed or doing some faux wainscotting by painting the top two-thirds all around my room. Instead, I opted to leave things white on the upper third of the room, giving an illusion of height. Amidst others’ protest, I planned to paint everything below 64 inches, including baseboards and door frames.
I repainted the white on the top third of my room and let it cure overnight. Fresh paint makes it easier to achieve a clean tape line! I used a weighted average measurement to draw my line. I plotted my way around the room and then connected the dots with a 4 ft level. Drawing lines of plaster walls in an old house is a little challenging; I went back and made many corrections. Ultimately, I relied on my eyes for final approval before taping.
I used UltraSharp Line painter’s tape and paid careful attention to the wall’s imperfections. Things like many ridges of the doors and door frames. I opted not to paint behind my closet because it seemed unnecessary.
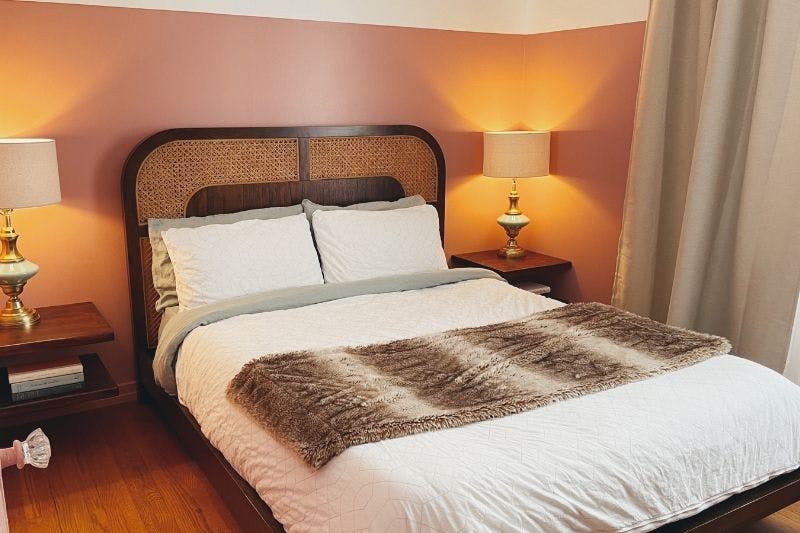
After that was all sorted, I got to painting. I chose a dusty rose colour called Lady Guinevere by Behr Marquee. Before it was completely dry, I peeled off the tape, which was a very anxiety-inducing but ultimately satisfying process. A few spots bled through around the frame, so I did a few touch-ups with a small paintbrush.
Save: tricking my window treatments.
One of my major qualms with my room was the window position, which is entirely off-centre. But the proximity of the open closet to the window made everything worse. I would have liked to cut a hole in the side of my house and put an even bigger window in. But, alas, there was a much cheaper solution: just be a little tricky!
I shopped at IKEA for a white double curtain rod. I know that black is super hip, but I wanted the rod to disappear as much as possible. Since I was going bold with pink walls, I knew that I needed something a bit more neutral. I chose a warm, creamy beige for the first rod and some cool sheer curtains for the second.
I often see curtains hung just wide and over top of the window frame, which is fine. But depending on where you buy your curtains, it usually means you also have to hem them. I like hanging the rod as close to the ceiling as possible, making the room look taller. I also exaggerated the window’s size a foot or so to the left. This makes it seem like the window is wider than it is and more centred than it is. I did this part before I painted, and it already proved to be a game-changer.
Thrift: second-hand scouting
In advance of starting my room, I started searching for some items that I thought I could get second hand. On my hit list, I had lamps, bedside tables, and a mirror. I liked using Facebook Marketplace for thrifting because it does a good job of showing you things you’re looking for. So getting a jump on searching before you feel like making a decision gets the algorithm working for you.
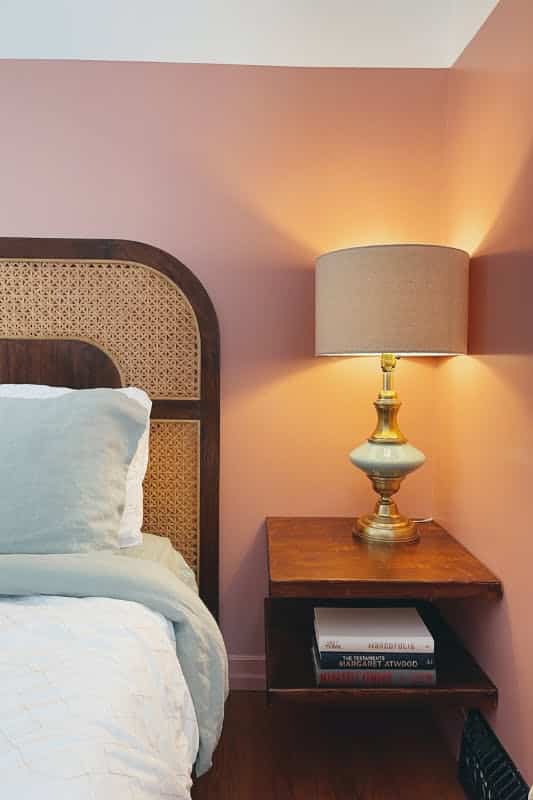
Unfortunately, I couldn’t find any bedside tables that worked, but I still found some treasures! I snagged two matching brass lamps ($30 for both) and a 70-year-old mirror from Edmonton’s Drake Hotel (for $40). The lampshades had to go, so I swapped them with a linen drum shade from Crate and Barrel. The lamps were big for my room’s scale, so I toned down the brass with some Rustoleum clear matte spray.
The mirror was perfect just the way she was; I hung it on the opposite wall from the window. This gives the illusion of more width by reflecting some natural light from outside.
Create: make something instead!
I struck out on the side tables thrifting, and I didn’t feel like buying something brand new. My current bedside table ends up being a catch-all for multiple water glasses, stacks of books, face creams, etc. But let’s be real, the drawers are even worse. So rather than continuing my search for another dump zone, I thought I would consider functionality instead. What I needed was something to hold a lamp and a couple of books. And hopefully, something without hidden storage so I can resist shoving things inside the drawers instead of putting them away.
My room’s narrow width was finally an advantage. I could anchor the shelves to the back and sidewall, providing more support. The shelves were made out of pine, which is very cost-effective. To give it a dark walnut-y stain, I used a shade of stain much darker than the colour I wanted to achieve. To make things easy, I used a one-step Stain and Polyurethane by Varthane to stain and seal my wood with two easy coats. You can buy this brand in teeny cans of only 236mls, perfect for a small project like this.
After installing them with some homemade brackets, also pine, the shelves worked to balance the room. The negative space between them helped the dark wood feel light and airy.
Splurge: my bed, the crown jewel

In truth, it was the Nadi Cane Bed from CB2 that inspired me to glow up my room. I rehomed my handmade bed to a friend who needed one to make way for my masterpiece. One might argue frivolously that this splurge was unnecessary. But by golly, I feel like I deserve it.
I find furniture to be obnoxiously expensive at times. I have opted for less expensive alternatives or some make-do mentality to get me through. But I admit that adding some ‘high’ pieces can really elevate a room, even when the majority is budget-friendly.
With a little imagination, a lot of paint, and some quick tricks, I transformed my lackluster bedroom into a luxurious and intimate hideaway! I can’t wait to roll up my sleeves to tackle my next project.